It’s that time of year again. School is out. The sun stays high in the sky until after Riker’s bed time, and casts light on the flaws in our old house. My limbs start itching to be put to work. That’s right; it’s renovation time!
ASSIGNMENT: KITCHEN
BUDGET: As low as possible, without compromising the quality.
STATUS: ACCEPTED
Honestly, this kitchen has been a project three years in the making. These first few pics are from when we first bought our fixer upper house in October of 2015.
Riker was only 2 years old!

When we moved in there was no room in our tight budget to fix up our kitchen. We busied ourselves with other projects we agreed were more pressing and less expensive (new front door, paint everywhere, updated the bathroom, basement, and sunroom etc.). In hindsight we probably could have afforded this renovation much sooner if we had known we could be so cost effective. We know for our next house now. lol


For two years I lived with the dropped ceiling florescent lights that blinked like the pilot episode of The Walking Dead. Thankfully, I’m not claustrophobic.

I chose to ignore the cheap back-splash that looked like laminate until you actually touched it. The worst part was the countertop that sunk so low it rivaled the Titanic.


I swore though that I would at least stain the cabinets and fix the hardware! There is only so much this artsy girl can live with. 😉 So I stained them a cherry color and spray painted the handles with silver nickle. (I never took good pictures of this step, so you will just see that result in the before pictures down below.) This was the only update we achieved in this room as we utilized the time in other rooms and outside landscaping.
Now let’s fast forward two years. Last summer I said “Enough already!” and tore down that awful nightmare of a dropped ceiling.

This is what lurked beneath the dangerous plastic panels. BTW, I still have nightmares of the dead bugs that rained down on me this day. *shutter*

Notice the lovely hole that was uncovered. The sheer number of holes we have found in this house continue to astound me. I’m surprised we weren’t more overrun by mice! *shutter* Praise God we are cat people!

I then took down the florescent lights, put up some track lighting, and installed a vent for the air conditioning. The hole for the vent was massive so I had to think up making a wooden frame so I could install the vent properly. I, unfortunately, installed that bloody thing crooked. Serves me right for putting the wood up when I was exhausted from the day. *facepalm* At least it’s solid and without holes.

For the gigantic hole I hammered up a piece of drywall and covered it heavily with spackle.

After a few more coats of spackle and two coats of paint, you couldn’t tell any holes existed!

Walla! Our kitchen was well on it’s way to stardom!

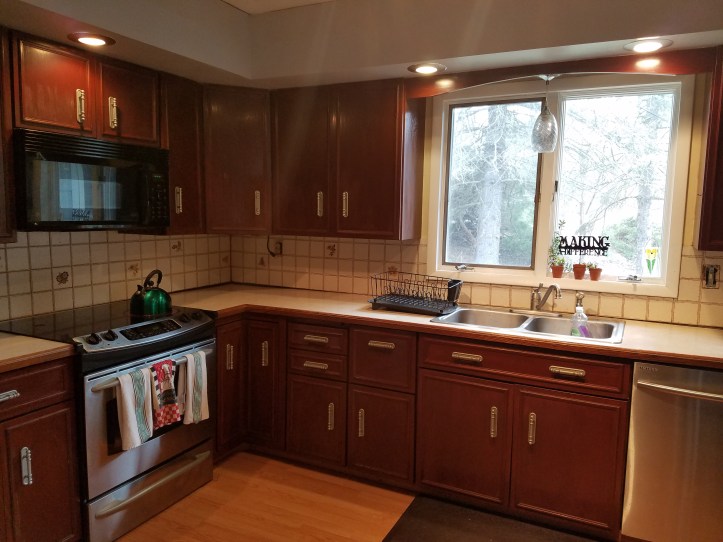
That brings us up to date to this year! Here are the not as hideous, but still sad, before pictures. 🙂
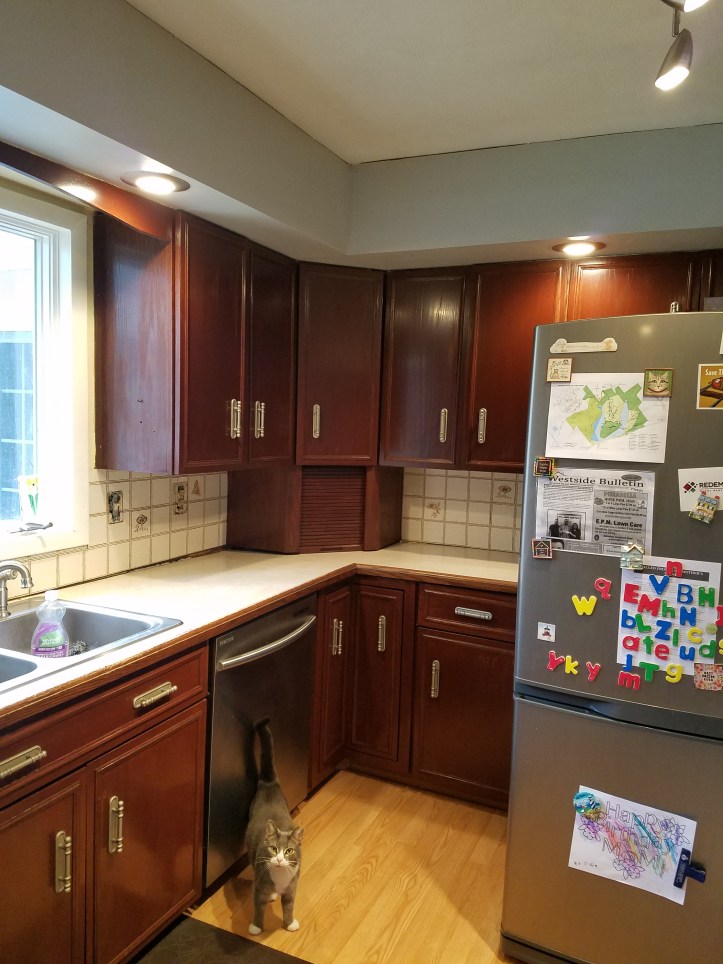
Petra had to get into the shot.
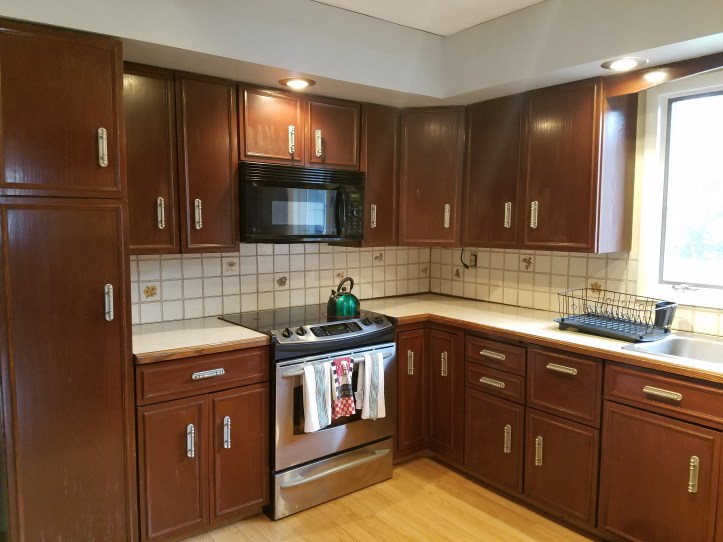
Notice how the cherry stain did NOT age very well in just 2 1/2 years. I knew I absolutely didn’t want to go that route again. But first, I had my sights on that tile. Its time had now come…


Surprise, surprise there were more holes uncovered! The plaster behind the tile also disintegrated due to age.


Once the tile was gone, it was time to patch up the holes! I used a netting I got at Lowes. Its especially made for holes larger than 1″. I stuffed the cavities with insulation, applied spray adhesive heavily, placed the netting, then applied spackle.

I used the green bucket first because it is a heavy quality spackle, then I finished off with the blue bucket since it’s easier to sand.

What holes?!

Smooth as glass.

I also found a surprise underneath a section of the ugly tile. Now, if these turquoise gems had been on these walls instead, I would have been inclined to keep them! Oh well. On to the beautifying…


It was time to prepare the cabinets for painting! First, I washed them with soap and water. It was important to sand them down with the green scrubber to take the shine off to allow the primer to stick.


I used a bonding primer that is specially made for cabinets. The room then already started to brighten up!


The large paint brush was perfect for speed, but one of my art brushes was needed to get in those tight spots.


It took three coats of gray “cabinet paint” to make it look brand new! Sorry, I failed to take a picture of the paint bucket before I threw it out. *facepalm* I got it at Lowes though and it was specifically for cabinets. LOVED IT!!
I also took the handles off to give them three coats of textured black metallic spray paint.
Now it was time to call in the professionals to complete one task that I simply couldn’t do myself; granite countertops. Oh my! For the first time in my life I’m able to get granite & I didn’t have to sell a kidney to make it happen.


*happy sigh* Aren’t they gorgeous?! We got an incredible deal on this stone beauty; $3200 for the whole project. Pinch me please.


There had to be a hiccup; our old cabinets were blamed for being crooked. Oh dear. Now there was a gigantic eye sore of a gap. I wasn’t happy. Praise God that we chose a wonderful company (Penn Granite) to install our countertops who hired out a contractor to fix this pesky problem!


We bought the wood, and he installed it. He also installed a brand new faucet for us too! (pictured further down) We only had to pay him for his added time. $100 was well worth the results.

Now that the counter tops had been installed, I could touch up any scratches to the paint and finish off with two coats of water-based polyurethane! Here’s a little tip that I learned from experience: NEVER use the oil-base polyurethane unless you love your projects to yellow with age. Ugh. Plus, the water-based one smells 1000% better.
Now for the drum roll please as I unveil the results from my hard work, blood, sweat, and tears of joy…

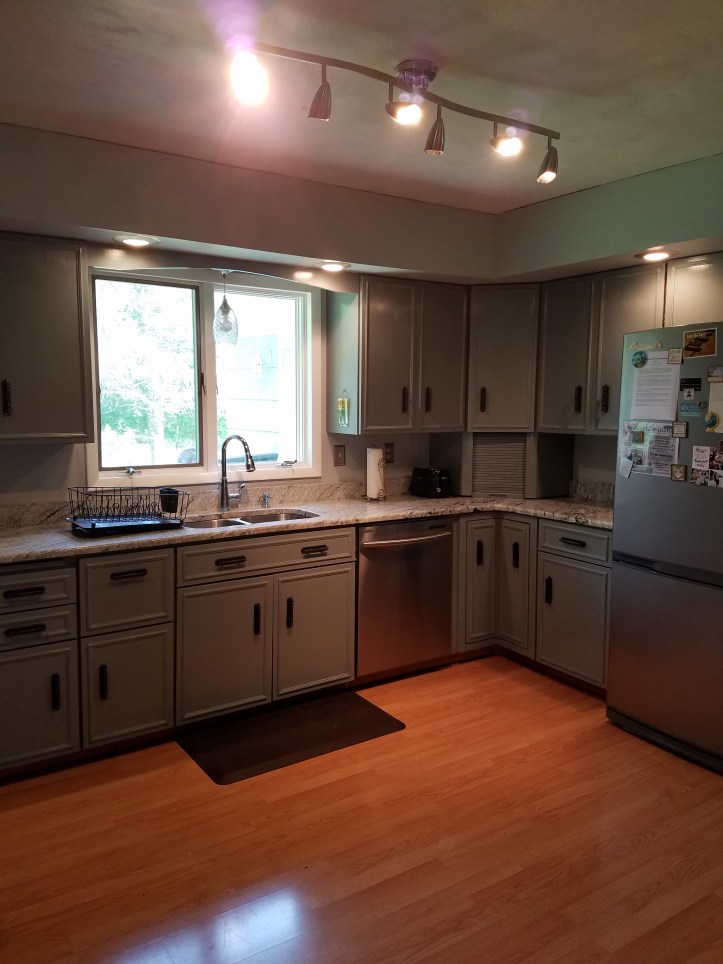

I now live in paradise! The question is; do we love it or list it? lol I’m going to love it as long as I can!
BTW, this project cost less than $4000 from start until finish! $3200 of that was on the countertops. Not bad for a girl 😉
Have any questions? Hit me up in the comments!

Awesome job!
LikeLiked by 1 person
Thank you! 🙂
LikeLike
[…] remodeled our Kitchen. […]
LikeLike